Braised Kale and Turnips with Smoked Turkey

Braised Kale and TurnipsEat your greens!

Sometimes not the most exciting part of your meal but this recipe will change you and your dull relationship with greens. While living in NYC, I was fortunate enough to work as a recipe tester at Bon Appetit and this was one of my most memorable recipes.

I like greens. I like smoked turkey. But turnips…?

The recipe was easy to follow and didn’t have too many ingredients. I love collard greens and figured this was just a variation using turkey instead of ham hocks. But something magical happens when you cook the greens in the smoked turkey broth. It becomes rich and silky, meaty,  slightly spicy and smokey with a tang of the vinegar at the end to perk up the braise.

Do not doubt this recipe. It is not the most picture perfect but your tummy will thank you later.

 Braised Kale and Turnips with Smoked Turkey

Adapted from Bon Appetit

8 servings

1 serving = 1 ½ cups = 5 PP+

15 minutes prep time

30 minutes cook time

  • ½ # smoked turkey wings
  • 1 tbsp olive oil
  • 3 cups onions, sliced
  • 1 tsp crushed red pepper flakes
  • 6 garlic cloves, minced
  • 1# turnips, medium dice
  • 16 cups of kale
  • 1 tbsp apple cider vinegar
  • 2 tbsp butter
  • salt and pepper, to taste

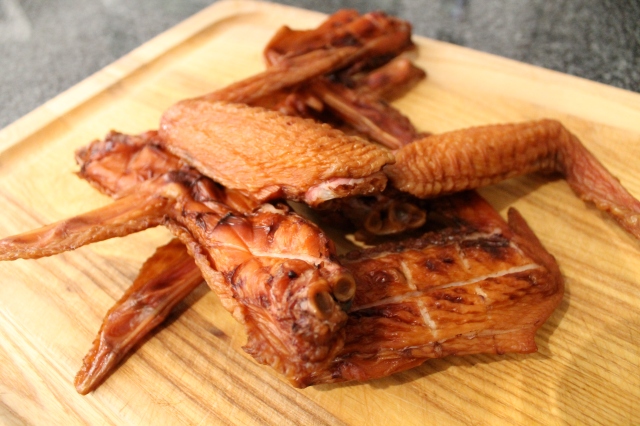
First, place the smoked turkey wings in a large pot. Add cold water so that the wings are covered. Bring to a boil; reduce to a simmer and cover until the wings are tender. This should take about 1 hour. Strain off the broth from the turkey wings but save 4 cups of broth for kale. Remove the skin from the wings and shred/pick the meat (try not to eat too much of it during this process).

Smoked Turkey Wings IMG_1725

Heat a large dutch oven over medium heat. Add the onions and crushed pepper flakes. Cook until the onions become tender. Add the garlic and sauté for 1-2 minutes until fragrant. Add the turnips and 2 cups of broth. Bring to a boil and cook for 2 minutes.

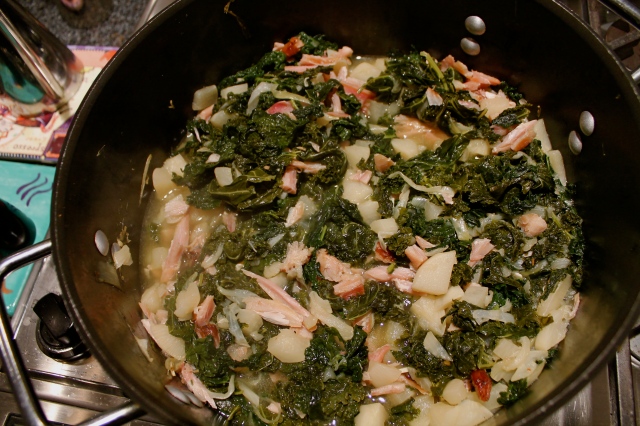
IMG_1800

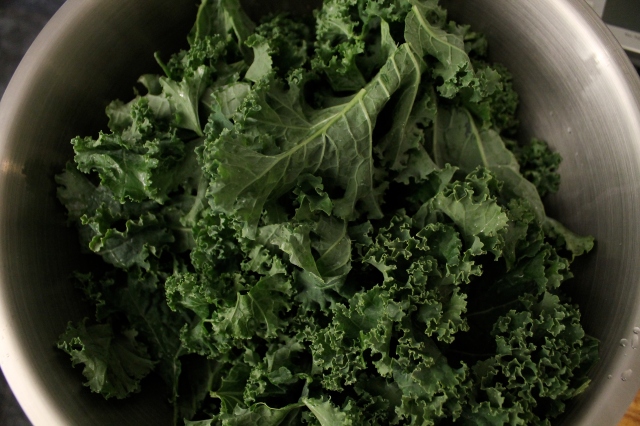
Add the kale; this will be done in batches. Cook, stirring often and add more broth in ¼ cup increments if the mixture becomes dry. Cook until all the kale is wilted and the turnips are tender; around 10-15 minutes.

Kale

Stir in the reserved turkey meat. Add butter and apple cider vinegar. Season to taste with salt and pepper. Now eat your greens!

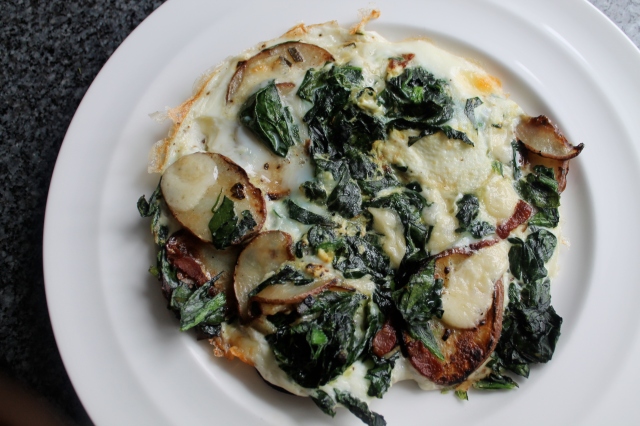
Bacon, Potato, Spinach, and Cheddar Frittata

Frittata

On those days when you know that you’re going to be running around like a chicken with its head cut off, you need to make this dish. Frittatas are a great vehicle for whatever ingredients you have on-hand and can be enjoyed for breakfast, lunch, or dinner. Did I mention it’s also a one-pot meal?

I realized many years ago during my weight loss adventures if I substituted egg whites for whole eggs in my omelettes and frittatas that I could have more gluttonous ingredients so I would not feel so deprived. For this particular frittata I have included all my guilty pleasures…bacon, potatoes, and cheddar cheese. Yes, you read that correctly. However, I also had to balance it out by adding a bunch of spinach (literally one whole bunch). This recipe proves you can have anything you want…in moderation!

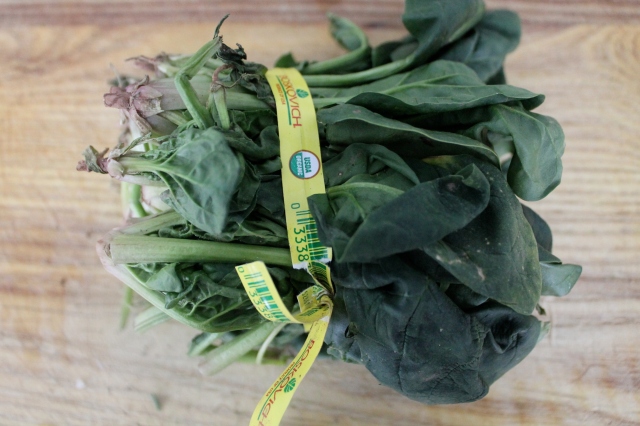
Bunch o' Spinach

Bunch o’ Spinach


Bacon, Potato, Spinach, and Cheddar Frittata

Makes 1 serving

1 Frittata = 8 Points Plus

Prep Time: 10 minutes

Total Time: 17 minutes

  • ½ slice of bacon, sliced
  • 2 scallions, sliced
  • 1 small red potato, thinly sliced (about 3.5 oz)
  • 1 bunch of spinach (about 1.5 cups), chopped
  • 1 tsp garlic oil (or olive oil)
  • 4 egg whites, beaten
  • ½ ounce white cheddar cheese, cubed

Preheat oven to 350°F. Add sliced bacon to a non-stick pan on low heat. Cook until crispy. Remove bacon and place onto a paper towel–lined plate. Keep bacon grease in pan (only comes out to ½ tsp).

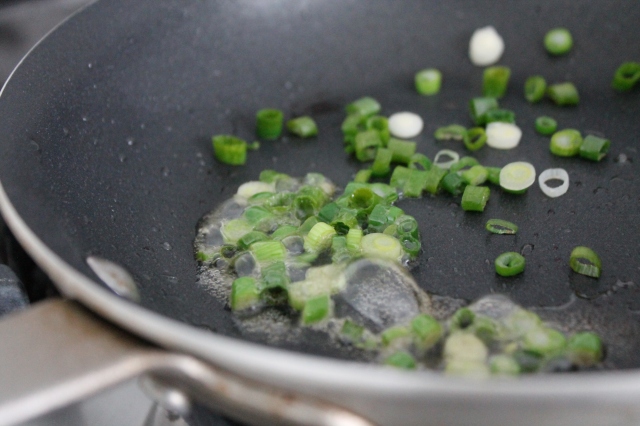
Fry Scallions in Bacon Fat

Fry Scallions in Bacon Fat

Turn the heat up to medium and add the scallions to the bacon fat. Cook for 1 minute. Add the potato slices and season heavily with salt and pepper. Cook the potato slices until golden brown and cooked through, about 7 minutes.

Crispy Potatoes

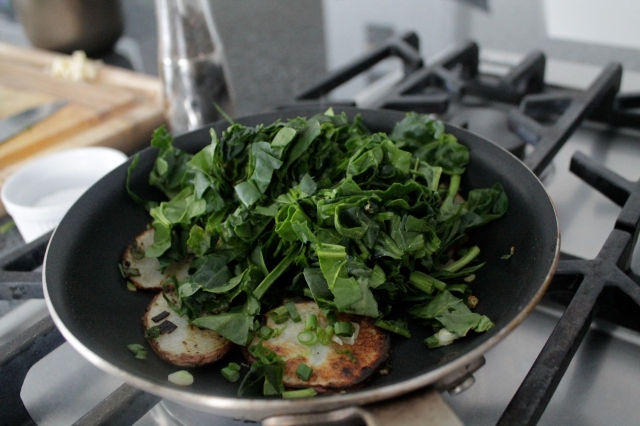
Add the chopped spinach.(There will be a lot of spinach…don’t worry!) The spinach will eventually wilt down to half the amount. You can add a lid to the pan to speed up the wilting process. Season again with salt and pepper.

IMG_2990

Pouring Egg Whites

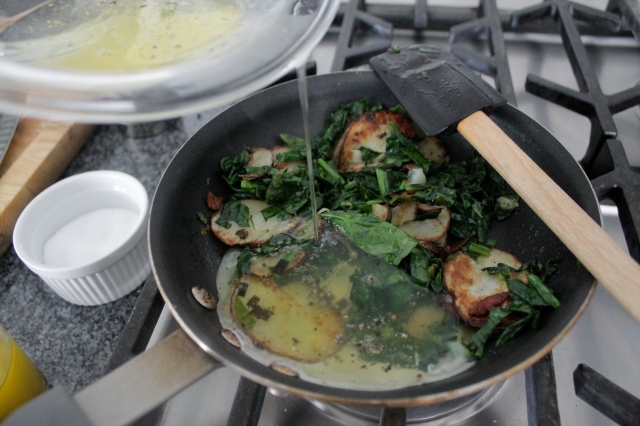
After all the spinach has been wilted, add 1 tsp of garlic oil to the spinach and potato mixture and add the eggs whites. Add the cubed cheddar cheese and reserved bacon and stir the egg whites a few times just to incorporate all the ingredients together. Let the frittata cook for 2-3 minutes to set on the bottom without stirring. Then put the pan into the oven and cook for another 3-4 minutes until the egg whites are cooked through. Serve immediately or at room temperature.

Mmm...Bacon

Mmm…Bacon

Soy-Cured Salmon, Asian Pear, and Cilantro Crème Fraîche

Ooo La La

Ooo La La

Eating healthy is not just salads and egg white omelettes, although sometimes I think about what I eat and salad and egg whites resurface often. However, you can have restaurant or “chef-inspired” dishes on a regular basis with a little fine-tuning and adjustments. In this case, I did not have to change anything in the recipe for once.

I first came across this recipe when I was in Paris at Market (a Jean-Georges Restaurant) that my friend dragged me to. At the time I wanted to experience real French cuisine…duck confit, sole a la meunière, beef Bourgogne not some Asian-French fusion. (You can see why I joined Weight Watchers upon my immediate return from Europe.) I also did not realize it was a Jean-Georges restaurant until after the meal. In the end, it was the best meal I had in Paris even though I felt odd sitting there with chopsticks in hand while dining on the Champs-Élysées.

This recipe is perfect for impressing people (“you cured it yourself?!”) and can be served as an appetizer with crackers or blinis or as a first course. It can also be a light and sophisticated lunch for one while leaning over the kitchen sink.

Soy-Cured Salmon, Asian Pear, and Cilantro Crème Fraîche

From Asian Flavors of Jean-Georges by Jean-Georges Vongerichten

Yield = 4 servings

1 serving = 7 Points Plus

Prep Time: 20 minutes

Total Time: 20.5 hours (includes 20-hr marinating period)

Soy-cured salmon:

  • 1 cup light soy sauce
  • 1 cup fresh cilantro leaves
  • One 2-inch piece fresh young ginger, peeled and chopped
  • 1 fresh green Thai chile, chopped (substituted jalapeño)
  • One 9-ounce salmon fillet, skinned, trimmed, and halved lengthwise

Dipping sauce:

  • ½ cup plus 2 tablespoons crème fraîche
  • 2 scallions, white parts only, thinly sliced
  • 1/3 cup sliced fresh cilantro leaves
  • 1 tablespoon fresh lime zest, plus more for garnish
  • ¼ teaspoon minced fresh green Thai chile (substituted jalapeño)
  • 2 tablespoons fresh lime juice
  • 1 teaspoon salt
  • ¼ cup diced Asian pear (used Bartlett pear)

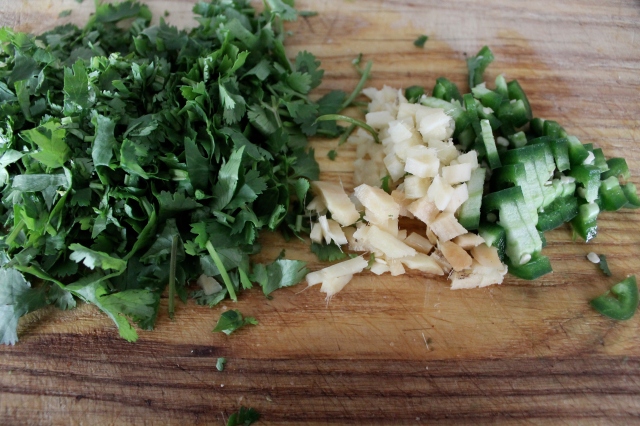
Cilantro, Ginger, Jalapeno

To start roughly chop the cilantro, ginger, and chile. I used jalapeno because there were no Thai chiles at the store. You can use fresno chiles, serrano chiles, or whatever you like. Chuck it all in your food processor and add 1 cup of soy sauce, preferably light sodium, and give it a whirl. It doesn’t have to be finely puréed, it should be a little chunky.

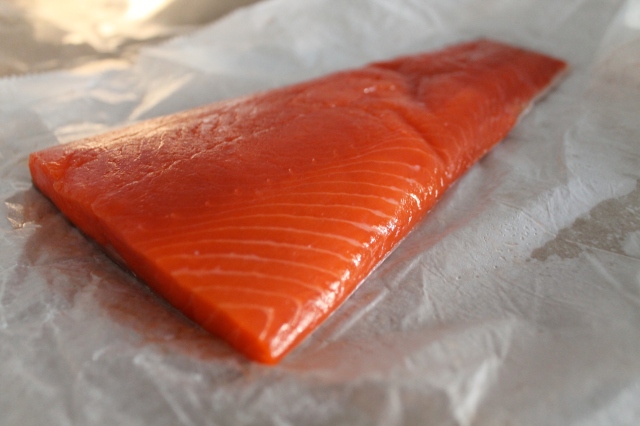
Sockeye Salmon

Beautiful Sockeye Salmon

IMG_2556

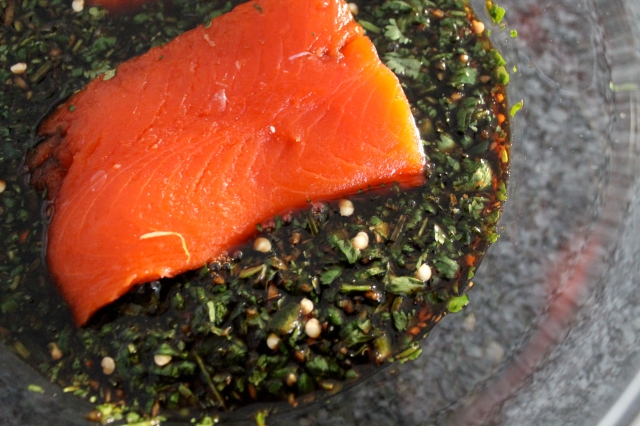
Place your salmon fillets into the marinade and make sure they are completely submerged. I like to put an upside down plate on top just to make sure it has a little weight. Cover with plastic wrap and let it sit overnight for a total of 20 hours. Do not marinate it longer than that so it does not over-cure.

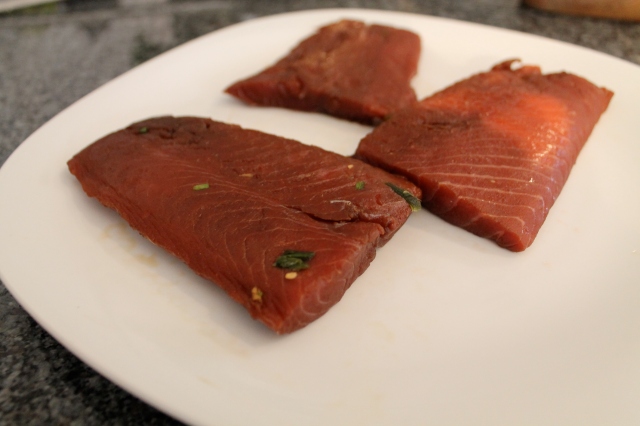
After 20 hours take the salmon out of the marinade and give it a rinse. Pat the salmon dry and set it aside. Don’t be off-put by the dark color, it’s just the soy sauce penetrating the flesh of the salmon. When you slice it, you’ll reveal the beautiful orange color of the sockeye.

Salmon After Curing for 20 Hours

Salmon After Curing for 20 Hours

Let’s have ourselves a little lesson on curing. Originally curing was used as a way to preserve food; it can take form as salting, drying, smoking, or pickling. Salt draws out the moisture which prevents the growth of microorganisms. In this case if you cure the salmon for too long, the soy sauce (i.e. salt) will draw too much of the moisture out of the fish and will cause it to be dry and salty. Therefore do not marinade the fish more than 20 hours.

Prep for Creme Fraiche

Next combine the crème fraîche, scallions, cilantro, chile, lime zest, lime juice, salt, and I throw in a little pinch of white pepper. Set aside.

Thinly Sliced Cured Salmon

Thinly slice the salmon in about 1/4″ slices. A sharp knife is a must in this situation, preferably a sharp slicer.

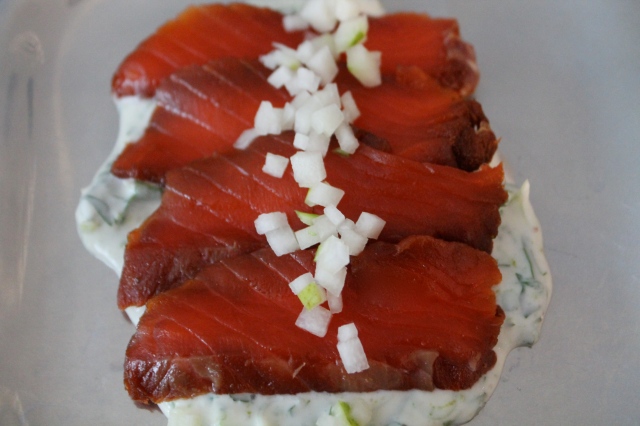
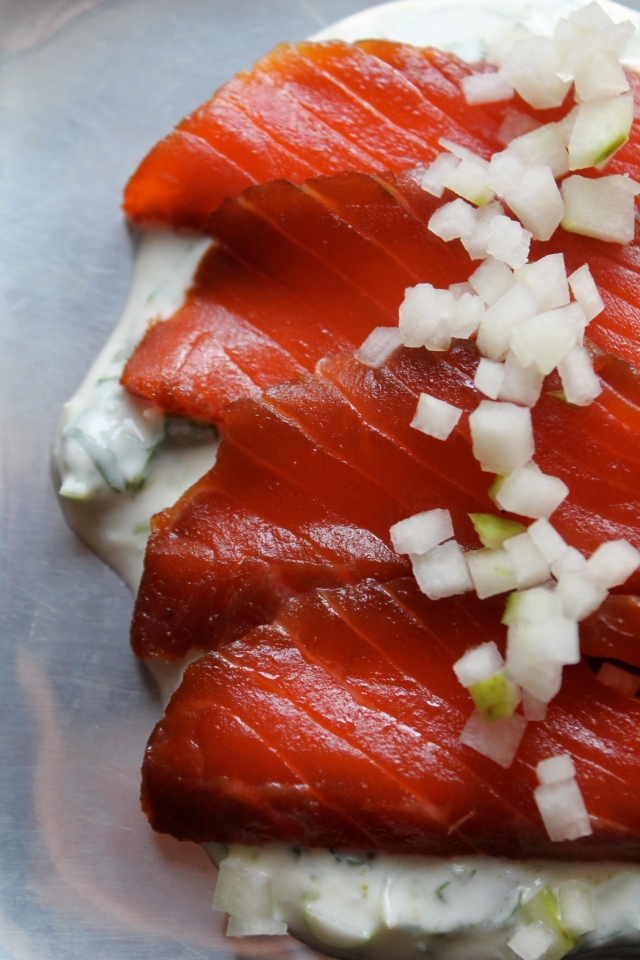
To serve, spoon some of the cilantro crème fraîche on the bottom of a plate. Shingle the sliced salmon on top of the sauce and then garnish with a brunoise of pear. (Brunoise is a fancy term meaning very tiny dice (exactly 1/8″ x 1/8″ x 1/8″).

Impressive, eh?

Impressive, eh?

The picture above showcases the beautiful and impressive presentation. I actually served it this way to my family for a nice, light appetizer before our Sunday dinner. However, when I made it for myself I bulked it up into a meal with the addition of cucumbers and extra pear. May not be as classy and a little on the messy side but just as tasty.

When no one was looking...this is what it really looks like

When no one was looking…this is what it really looks like

Chilled Green Pea Soup

So you’ve probably noticed I took a big time hiatus from FML and I apologize in advance for my negligence. Sometimes life takes over and we forget the important things in life…like taking 50 different pictures of a salad or re-testing pasta sauce until it’s just right.  But I’ve reprioritized my life and I’m back on track!

Even during the craziness of my life, I came up with this recipe and it’s super quick and easy and can be enjoyed all week in between your two jobs, yoga classes, shopping spree, Sunday brunches, and endless errands.


Chilled Green Pea Soup


Makes 6 Servings

1 serving = 1 cup


Prep Time: 20 minutes

Cook Time: 25 minutes


  • 1 tbsp olive oil, plus more for garnish
  • 1 bunch green garlic, thinly sliced
  • 1 small onion, thinly sliced
  • 2# shelling or English peas (should be about 4 cups of peas once shelled)
  • 1 quart chicken or vegetable broth
  • ½ cup mascarpone cheese


Just a couple quick notes: Green garlic is usually available at farmer’s markets in the late spring. If your market doesn’t have green garlic you can substitute it with 4-5 cloves of regular sliced garlic. Also if you can’t get your hands on fresh peas, go ahead and use frozen. Just make sure they’re thawed before you cook with them!


Green Garlic

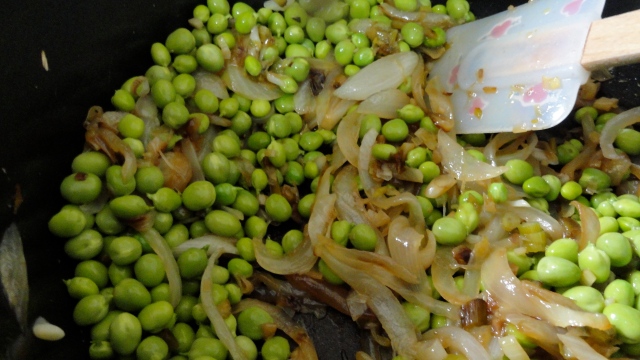
Heat the olive oil in a large pot over medium heat. Add your green garlic and onions and sauté until lightly golden and soft, about 10-15 minutes.


Next add your peas and sauté for 2-3 minutes. Season with salt and pepper. Add your broth of choice and bring the mixture to a simmer. Cook for 6-7 minutes or until peas are tender, but not mushy.

Add the pea and broth mixture to a blender or food processor and process until smooth. (You might have to do this in batches). While the mixture is pureeing, add the mascarpone until fully incorporated and creamy.

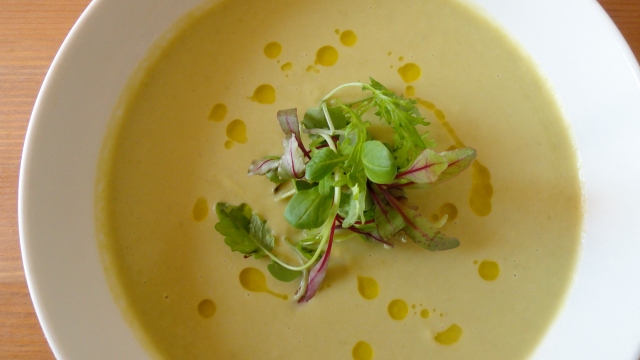
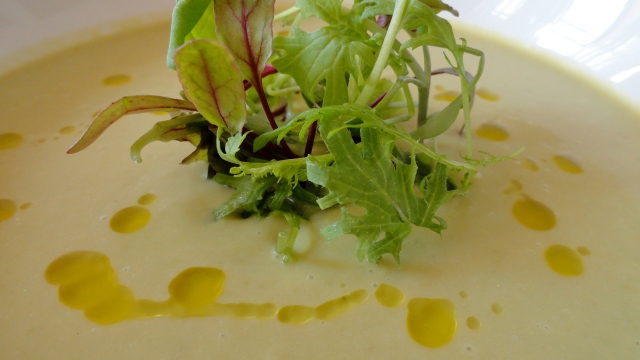
You can either serve this soup warm or chilled. When serving, drizzle extra virgin olive oil on top and garnish with herbs or microgreens of your choice. Nums!

Monkfish with Creamy Morels and Frisée

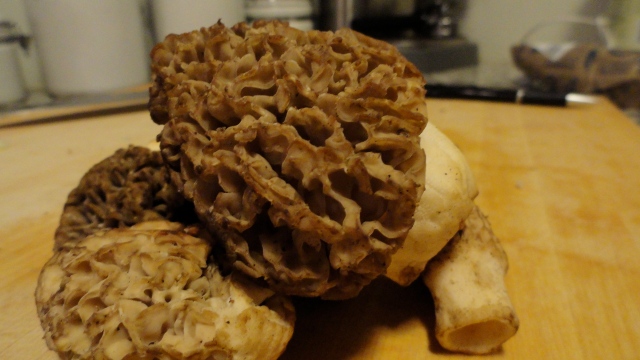
Sometimes when I go shopping I’ll buy an accessory…shoes, a purse, a piece of jewelry and I’ll end designing an entire outfit around that one item. This is essentially what I did when I made this dish. I found morel mushrooms at the farmer’s market and bought them on a whim, even though they were $30 a pound. They’re only around for a short period of time so said figured, what the hell…why not? All the other elements of this design were picked to heighten and complement the flavors of the morels.

Morel Mushrooms

Usually morels are served with rice, pasta, or potatoes so the morels have a blank backdrop to show their true flavor. Morels also pair perfectly with heavy cream. I substituted heavy cream for fat-free half-and-half and instead of serving this sauce with a big bowl of pasta I decided to serve it with frisée which is a very sturdy green that can stand-up to warm dressings and pungent ingredients.


Monkfish with Creamy Morels and Frisée

Makes 1 Serving = 7 Points Plus

Prep Time: 10 minutes

Total Time: 20 minutes

  • 4 oz monkfish
  • ¼ cup onions, minced
  • 4 oz fresh morel mushrooms*
  • 2 tsp thyme, minced
  • ¼ cup white wine
  • ½ cup chicken broth
  • 2 tsp vegetable oil
  • 3 tbsp fat-free half-and-half
  • 1 tsp butter
  • 1 scallion, sliced, green only
  • 2 cups frisée**
  • 1 lemon wedge
  • salt and pepper, to taste

*If you can’t find morels, you can subtitute any mushrooms you like…cremini, shiitake, chanterelles (would be awesome), oyster, etc.

**If you can’t find frisée use, any sturdy green you like or you can serve this sauce with any mild starch.

Season the monkfish with salt and pepper and set aside.

Heat a large sauté pan over medium heat and spray with non-stick cooking spray. Add your onions and thyme and sauté for 2-3 minutes until lightly softened. Add the morels and sauté for 7-8 minutes or until the mushrooms are soft and cooked through. Turn the heat down to low, and add the white wine. Simmer for 1-2 minutes or until alcohol flavor has cooked off. Then add your chicken broth and let that reduce by half.

While the sauce is cooking, heat a small sauté pan over medium-high heat and add your vegetable oil. Add the monkfish and cook on all sides until cooked through, about 6-7 minutes total. Set aside and keep warm while you finish your sauce.

Add the half-and-half to your sauce and allow to simmer for 2-3 minutes or until slightly thickened. Turn off the heat and add the butter and swirl the pan to incorporate the butter into the sauce. Add your scallions. Season with salt and pepper to taste.

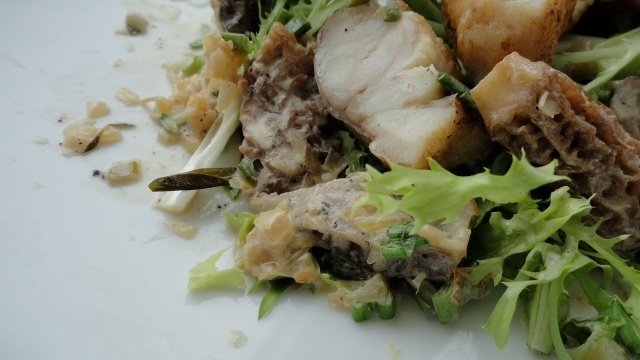
To assemble, lay your frisée on the bottoms of a large plate. Slice your monkfish and lay the slices over the frisée. Top with your creamy morels sauce and give everything a good squeeze of lemon. Dig in and use the frisée to mop up every drop of creamy goodness!

Miso Salmon with Soba Noodle Salad

Just to let you all know I do take recipe requests for my blog. So this one is for my Aunt Shelly, who pointed out that I didn’t have a recipe for salmon on my blog. This is something I have been making for many years and never fails to impress. It’s easy and quick enough to make during the week, and also can be dressed up for company on the weekends. The soba noodle salad is awesome because it can be served hot or cold, as a main dish or side dish and the ingredients can be adapted depending on the season and what you have on hand. Also, using soba noodles is a great way to introduce whole grains into your or your family’s diet without freaking anyone out.


Miso Salmon with Soba Noodle Salad


Makes 4 Servings

1 serving = 4 oz salmon and 1 cup noodles = 11 Points Plus


Prep Time: 25 minutes

Total Time: 45 minutes


For the Salmon:

  • 1# salmon (preferably wild-caught), skin off
  • 3 tbsp miso paste
  • 1 tbsp grated ginger
  • 1 tbsp rice vinegar
  • 1 tbsp soy sauce
  • 1 tbsp mirin
  • 1 orange, juiced
  • cilantro sprigs (for garnish)


For the Noodles:

  • 8.8 oz soba noodles (1 package)
  • 4 oz ramps (1 bunch), bottoms should be sliced and tops can be left whole**
  • ¾ # asparagus
  • ¼ cup soy sauce, divided
  • 1 tbsp sesame seeds
  • 1 tbsp rice vinegar
  • 1 tbsp brown sugar
  • 1 cup bean sprouts


**If ramps are not in seasons, feel free to use a combination of scallions (1 bunch) and 2 cloves of sliced garlic.


Asparagus @ Union Square Greenmarket

Preheat the oven to 375°F. Combine miso paste, ginger, rice vinegar, soy sauce, vinegar, mirin, and orange juice and set aside.

Bring a large pot of salted water to a boil. Add the soba noodles and cook according to the package’s directions (usually about 8 minutes) until the noodles are cooked through. Drain and set aside.

Soba Noodles

Meanwhile, combine 2 tbsp soy sauce and 1 tsp sesame oil in a large bowl. Add the asparagus and thoroughly coat the asparagus in the dressing. Place asparagus on a foiled-lined sheet tray and place into the oven. Cook for 4-5 minutes or until crisp-tender. Cut into 1 inch pieces and set aside.

In a medium sauté pan, add ramp bottoms and sauté for 1-2 minutes or until soft. Add the ramp tops and cook until slightly wilted.

In a large bowl combine remaining soy sauce, sesame oil, rice vinegar, and brown sugar. Whisk to combine until sugar has dissolved.


When the soba noodles are cooked through, drain well, and add to large bowl with the dressing while the noodles are still hot. Add the asparagus, ramps, and bean sprouts and toss everything together to combine thoroughly. Do a quick taste test to make sure everything is properly seasoned. You can either keep this salad at room temperature or refrigerate to serve it chilled.

For the salmon, brush the miso glaze onto both sides on the salmon and place on a foil-lined sheet pan. Place into a preheated 375°F oven, and bake until the fish is about medium in temperature, about 10-12 minutes depending on the size of your filet. Let me the salmon rest before you cut into it. Garnish with cilantro sprigs.


My favorite was to enjoy this dish is with the warm salmon sitting on top of the cold noodles because I love the contrast in temperature. Keep the requests coming!

Sweet Potato Pancakes with Ramp Pesto

Out with the old and in with the new! Well…kinda. One of the best things about the changing of seasons is being able to use ingredients from one season with fresh ingredients from the new season. This recipe was inspired by the marriage of winter and spring. Even though, there are fresh, new green things popping up at your farmer’s markets, there will still be those “cold storage” items selling throughout the spring like potatoes, root veggies, and apples. So on one recent trip to the market I bought sweet potatoes and freshly harvested ramps. Combine the two together and you’ve got something awesome and seasonal.


Sweet Potato Pancakes with Ramp Pesto


Makes 4 Servings

1 serving = 3 potatoes pancakes + 1 tbsp pesto = 4 Points Plus


Prep Time: 30 minutes

Total Time: 1 hour


Sweet Potato Pancakes:

  • 1 extra-large sweet potato, grated
  • 2 egg whites
  • 1 whole egg
  • 2 tbsp flour
  • salt and pepper to taste


Pesto:

  • 1 bunch of ramps, coarsely chopped
  • ¼ cup of chicken broth
  • 1 tbsp pine nuts, toasted
  • 1 tbsp olive oil
  • 1 oz Parmigiano Reggiano, grated


Preheat your oven to 300°F. Lightly beat your egg whites and whole egg together. Mix your egg mixture with grated sweet potatoes and flour. Mix gently until everything is combined. Season with salt and pepper. Cook up a little potato pancake “tester” to check the seasoning.

(I usual add some ¼ cup of grated shallot or onion when I make potato pancakes, but since this served with the ramp pesto I decided to omit it because I didn’t want the onion flavor to be overpowering. If you are not serving the ramp pesto then I would add the grated shallot or onion.)


Heat a large, heavy-bottom sauté pan over medium heat. Spray with non-stick cooking spray.  Use a 1/3 cup measure to portion your sweet potato pancakes. Add 3 sweet potato pancakes at a time to your sauté pan (or however many will fit). Brown on one side for about 3 minutes, flip, and then brown on the other side for 2 minutes. Place these sweet potato pancakes on a foil-lined sheet pan and put in your preheated oven to finish cooking. Continue this process with the rest of your sweet potatoes. Allow them to cook in the oven for at least 5 minutes or until cooked through.

To make the pesto, combine all ingredients except the Parmigiano Reggiano in a blender or food processor. Puree until smooth and then stir in your Parmigiano Reggiano. Season to taste with salt and pepper. Also, if ramps are unavailable you can use any green or herb you like (arugula, basil, scallions, chives, or combination of any of the above).


Serve your warm sweet potato pancakes with the cool ramp pesto. Enjoy the bounty of both harvests in one dish!


Linguine with Clams and Shrimp

Even though I am trying to live a healthy lifestyle, I still love a big bowl of pasta. Nothing is more satisfying and comforting than twirling long strands and biting down into perfectly cooked al dente noodles.  When making healthy pasta dishes I like to “rev” up the flavor with bright ingredients and different textures. I also recommend using fortified and whole-wheat pastas that have more fiber, protein, and more whole grains than “regular” pastas. This way you can have a smaller portion but still feel full. Feel free to add any extra vegetables to this dish and make it your own!

Linguine with Clams and Shrimp

Makes 2 Servings

1 Serving = 7 Points

  • 3 oz whole-wheat linguine (Healthy Harvest)
  • 2 tsp olive oil
  • 1 small spring onion, bulb and greens separated and sliced (can substitute scallions if spring onions are not available)
  • 2 garlic cloves, minced
  • 1 tsp crushed red pepper
  • 6 oz cockles or other small clams,  scrubbed and cleaned
  • ½ cup champagne or other white wine
  • 4 large shrimp (head on if possible), deveined
  • 1 tbsp fresh lemon juice
  • salt and pepper, to taste

Bring a large pot of water to a boil. Season the water aggressively with salt so it tastes like the ocean. Add your linguine or pasta of your choice.

Spring Onion

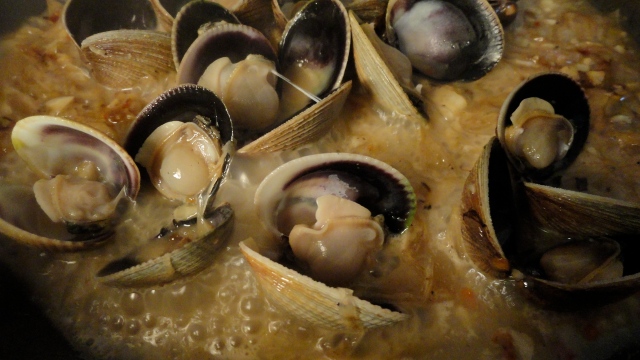
While the pasta is cooking, heat a large sauté pan over medium heat and add 1 tsp of olive oil. Add the white bulb of your spring onion and cook until softened. Add your garlic and crushed red pepper and sauté for 1 minute. Then add your cockles and champagne and turn the heat to high and cover with a lid.

Cook the cockles for 3-4 minutes or until they open. In a separate small sauté pan add 1 tsp of olive oil over medium heat. Season your shrimp with salt and pepper and sauté in the small skillet for 3-4 minutes or until cooked through. Set aside and keep warm.

Drain the pasta when it’s “al dente” or slightly before “al dente” and keep 1 cup of the pasta cooking water. Once the cockles open, add your cooked pasta and cook together for 2-3 minutes. Add some pasta water if the sauce seems dry. Finish the pasta with lemon juice and green tops of the spring onions. Portion the pasta between two plates and top with your sautéed shrimp. Twirl with pleasure.

Shaved Asparagus Salad

Asparagus is one spring’s most versatile ingredients. It can steamed, sautéed, stir-fried, baked, broiled, and even grilled. In this dish I decided to have some restraint and let the asparagus be natural and delicate. This dish only has 4 ingredients, which means it can be made on-the-fly and enjoyed over and over again.

Shaved Asparagus Salad

Makes 4 Servings

1 Serving = 2 Points Plus

  • 1 bunch of asparagus, blanched and shaved
  • 1 oz parmigiano reggiano, shaved
  • 2 tbsp lemon juice
  • 1 tbsp extra virgin olive oil

First you want to blanch your asparagus in very salty water for 30 seconds. Take the asparagus out and shock it immediately in ice water. Allow to cool for 3-5 minutes. When asparagus are cool, drain them and pat dry thoroughly with paper towels.

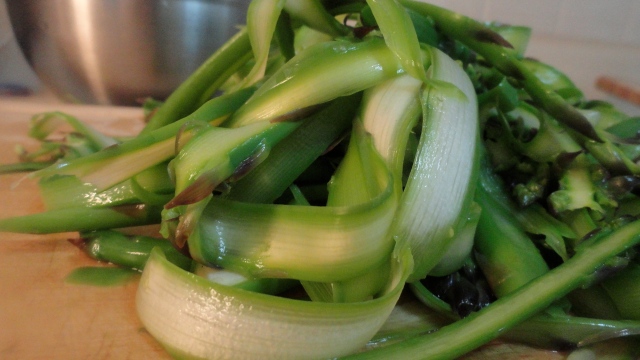
Next you want to shave the asparagus. You can either use a peeler or Japanese mandoline. If the asparagus are teeny-tiny you can just cut them in half.

Next whisk together lemon juice and olive oil. Season with salt and pepper.

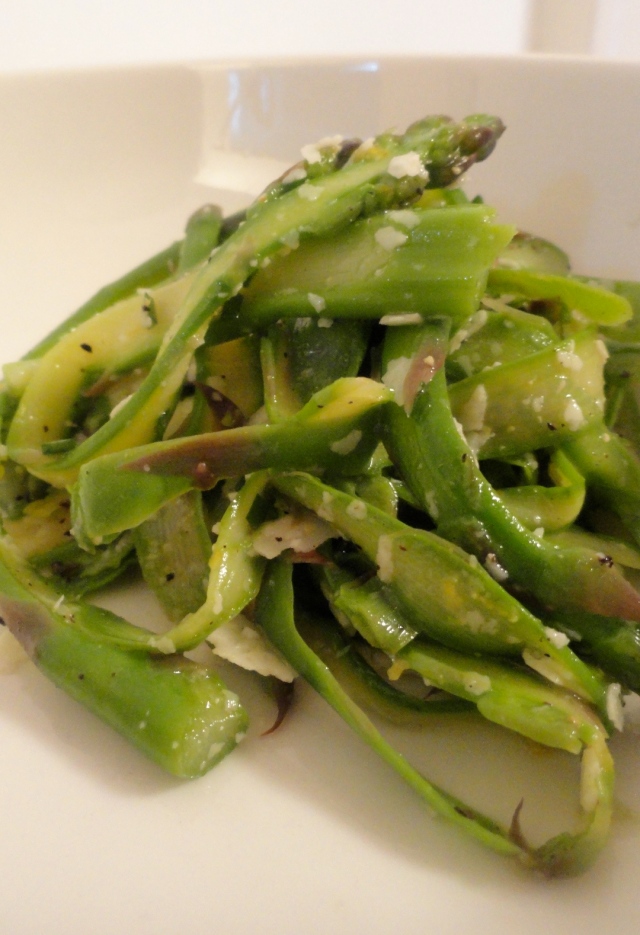
Combine asparagus, lemon vinaigrette, and the parmigiano reggiano. Season with salt and pepper.

Ramp Ravioli with Lemon Oil

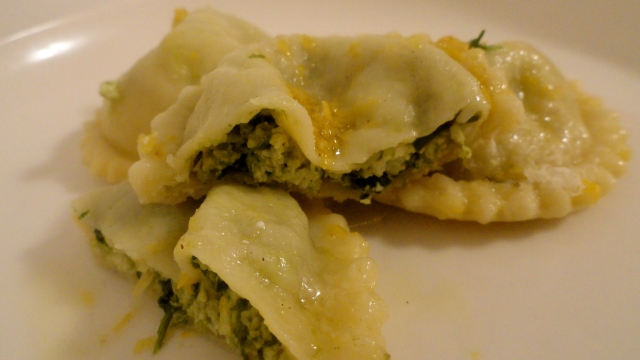
It’s finally that time…SPRING! I have waited months and months for the refreshing sight of green and bright vegetables and now it’s finally here! I promised myself that when ramps started appear at the market that I would use them whenever and wherever possible in my cooking. To kick off my spring festival, I decided to showcase ramps as the focus of this dish. A ramp is a wild onion that is foraged from The Carolina’s to Canada. They have a delicate garlic flavor and a mild onion flavor. They’re only around for about a month, so get ’em while you can! I went a little crazy with making my own pasta dough and my own ricotta cheese so please feel free to substitute the dough with wonton wrappers and you can purchase any kind of ricotta you prefer. This will save you time and money, and definitely some calories since fresh pasta dough isn’t the most figure-friendly. But this was a special occasion…the beginning of spring and a whole bundle of new ingredients to play with! Happy Spring!

Ramp Ravioli with Lemon Oil

Makes 4 serving (small servings about 4 ravioli each)

1 serving = 11 Points Plus

Pasta Dough

  • 0.5 # OO flour (can substitute all-purpose flour)
  • 2 eggs
  • 1 tbsp olive oil
  • 1 tbsp water
  • Pinch of salt

Ramp Filling

  • 2 tablespoons olive oil, divided
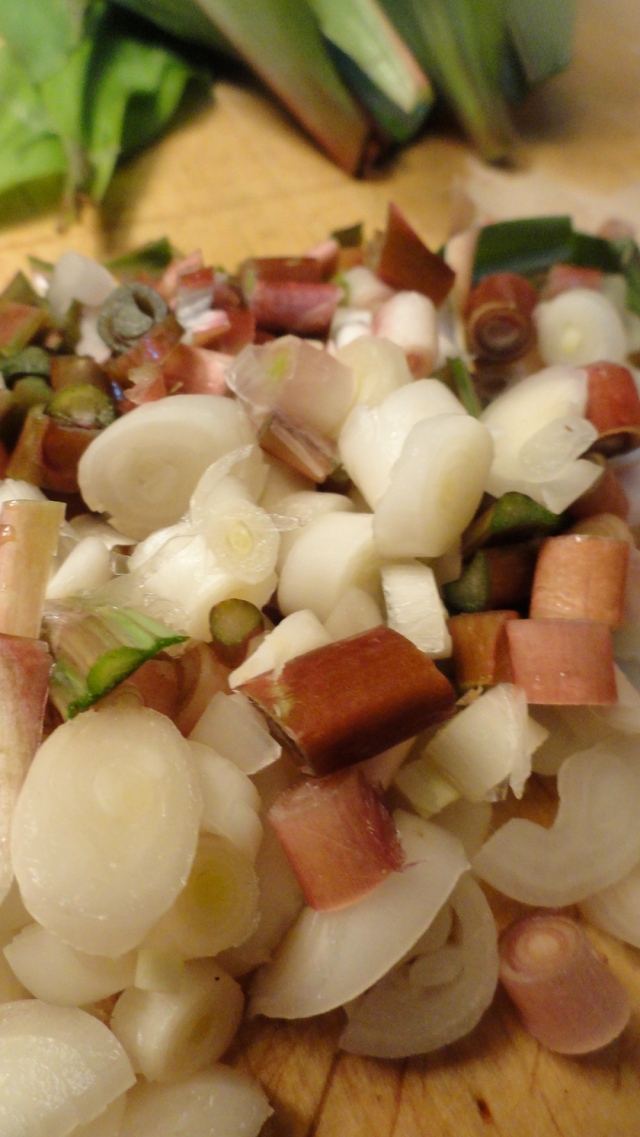
  • 2 bunches of ramps (about 6 oz), greens and bulbs separated and thinly sliced
  • 1.5 cups reduced-fat ricotta
  • ½ tbsp lemon zest
  • Salt and pepper, to taste

Lemon Oil Olive

  • 2 tbsp olive oil
  • 1.5 tbsp lemon zest

If you are making your own pasta dough by hand, you need to allot at least an hour of your time.

First make a well with your flour.

Flour Well

Add your eggs, olive oil, water, and salt to the center of your flour well.
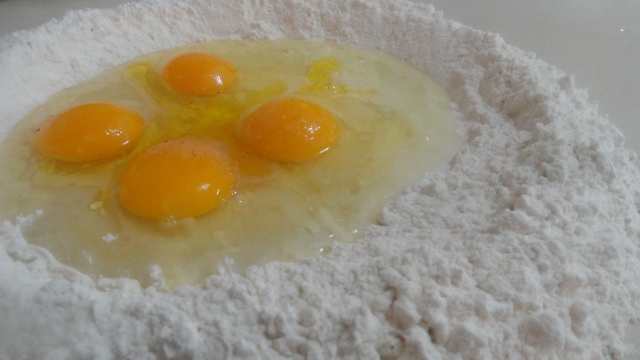
Add your Eggs, Olive Oil, Water, and Salt

First beat the eggs, water, and olive oil together in the center of the well. Once those are beaten together, slowly start incorporating the flour into your egg mixture being careful not to break the “well.” Eventually it will turn into a big gloopy mess, at this point you want to begin to knead your dough. Don’t worry if it looks sloppy, the dough will come together. I have included a video for your reference since some things are better learned by watching than reading.

Beat your Eggs

Slowly Add In the Flour
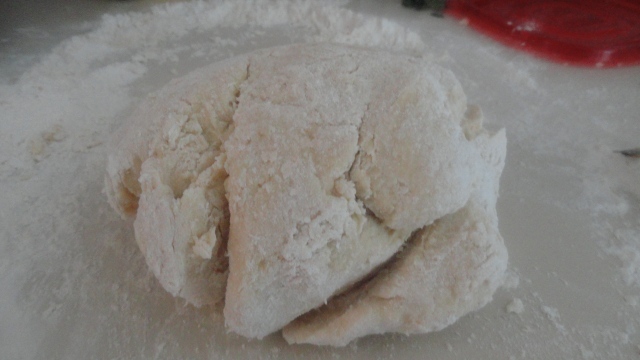
The Beginning of Pasta Dough...keep kneading!

Smooth as a Baby's Bottom

How To Make Fresh Dough

Once you have a smooth ball of pasta dough, wrap it up in plastic wrap and leave it in the refrigerator for at least 30 minutes to rest.

While the dough is resting you can make the filling. Place a medium sauté pan, over medium-low heat and add 1 tbsp of olive oil. Add your ramp bulbs and sauté quickly for 1 minute. Then add your ramp tops and sauté for 1-2 minutes. Season with salt and pepper and take the pan off the heat and allow the ramps to cool.

Ramps

To make fresh ricotta please reference by own recipe homemade ricotta, but make sure to include the honey or any other sweetener.

Once the ramps are cooled, add the ramps and olive oil to a blender or food processor. Puree until smooth. Taste the puree and season it accordingly.

Add the ramp puree and lemon zest to the ricotta and mix to combine. Season again if necessary.

Once your dough is rested you want to roll it out to make your ravioli. Now, I rolled my pasta dough out with a 99-cent rolling pin. This was rather difficult and a desperate attempt so I would recommend using a pasta machine instead. If you are using a pasta machine, you want to roll out the sheets to the thinnest setting.

Once the sheets are rolled out, you can place ½ tbsp of the filling to make individual ravioli. Top the sheet of pasta with the fillings with another sheet of pasta directly on top. Make sure to press around the filling to remove any air pockets. This is a crucial step! If you don’t do this, then your ravioli will explode when you cook them in boiling water. Once the air has been pushed out, you can use any ravioli cutter you like to make fun shapes, circles, or squares.

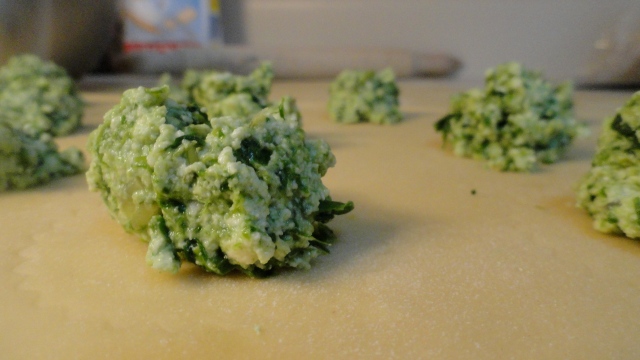
To make the lemon oil, combine 1 tbsp olive oil and lemon zest in a small sauté pan and gently warm up the oil over low heat until the lemon zest if fragrant. Set aside.

Bring a large pot up to boiling water, and season aggressively with salt (it should taste the ocean…no joke). Add the ravioli and cook for 3-4 minutes or until they float to the top. Taste one just to make sure they are done. Drain them well and then top with the lemon oil and serve immediately.
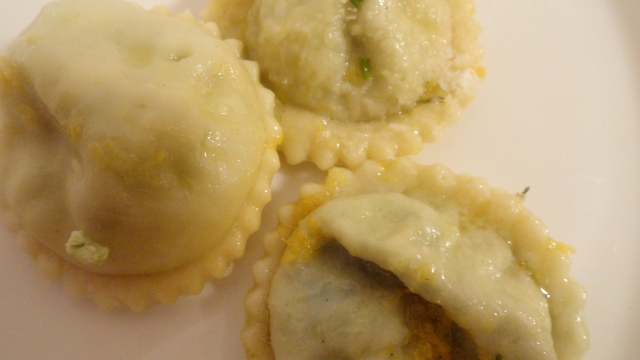
With one bite of ravioli you’ll know that spring has sprung.